


Installing a 4" casing is a crucial process in various industries, especially in oil and gas, water well drilling, and construction. As a reliable 4" casing supplier, I understand the importance of a proper installation process. In this blog, I will guide you through the steps of installing a 4" casing, ensuring that you can carry out the installation safely and efficiently.
Pre - installation Preparation
Before you start the installation, there are several key steps to take. First, you need to conduct a thorough site survey. This involves assessing the soil conditions, the depth required for the casing, and any potential underground obstacles. The soil type can significantly impact the installation method. For example, if the soil is sandy, it may require more support during the installation process to prevent collapse.


Next, gather all the necessary tools and equipment. You will need a drilling rig suitable for the depth and soil conditions, casing pipes, casing couplings, a lifting device such as a crane, and safety equipment like hard hats, safety glasses, and steel - toed boots. Make sure all the equipment is in good working condition and has been properly maintained.
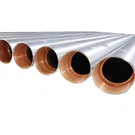
When it comes to the casing pipes themselves, as a 4" casing supplier, I offer a wide range of options. We have Cold Rolled Pipe, which is known for its smooth surface finish and high dimensional accuracy. Our CRA Pipe is corrosion - resistant, making it ideal for harsh environments. And if you need shorter sections, our Pup Joint can be a great solution.
Drilling the Hole
The first step in the actual installation is to drill the hole. The size of the hole should be slightly larger than the 4" casing to allow for easy insertion. The drilling rig should be set up on a stable surface and aligned properly. Start the drilling process slowly, monitoring the progress closely. Pay attention to the drilling speed, the amount of torque, and the flow of drilling fluid.
The drilling fluid, usually a mixture of water and additives, serves several important functions. It helps to cool and lubricate the drill bit, carry the cuttings to the surface, and maintain the stability of the hole. As you drill deeper, you may need to adjust the properties of the drilling fluid to suit the changing soil conditions.
Lowering the Casing
Once the hole has been drilled to the desired depth, it's time to lower the casing. Use the lifting device to carefully lift the first section of the casing and lower it into the hole. Make sure the casing is centered in the hole to prevent it from getting stuck. As you lower each additional section of the casing, connect them using the casing couplings.
The casing couplings play a vital role in ensuring a secure connection between the casing sections. They need to be tightened properly to prevent any leakage or separation during the installation process. Use a torque wrench to ensure that the couplings are tightened to the recommended specifications.
Cementing the Casing
After the casing has been lowered into the hole, the next step is to cement it. Cementing is important for several reasons. It provides support to the casing, prevents the migration of fluids between different geological formations, and protects the casing from corrosion.
Prepare the cement slurry according to the manufacturer's instructions. The slurry should have the right consistency to flow easily into the annulus between the casing and the hole wall. Use a cementing pump to pump the slurry into the bottom of the casing. As the slurry rises, it will displace the drilling fluid and fill the annulus.
Monitor the cementing process carefully. You need to ensure that the slurry is evenly distributed around the casing and that there are no voids or channels. Once the cement has been pumped to the desired height, wait for it to set. The setting time can vary depending on the type of cement used and the environmental conditions.
Testing the Casing
After the cement has set, it's important to test the casing to ensure its integrity. There are several types of tests that can be conducted. One common test is the pressure test. Apply a specified pressure to the inside of the casing and monitor for any pressure drops. A significant pressure drop may indicate a leak in the casing or the cement job.
Another test is the integrity test, which uses various techniques such as ultrasonic testing or electromagnetic testing to detect any defects in the casing wall. These tests can help you identify any potential problems early on and take corrective actions if necessary.
Post - installation Inspection
Once the testing is complete and the casing has passed all the tests, conduct a post - installation inspection. Check the surface of the casing for any signs of damage or corrosion. Inspect the area around the casing for any signs of subsidence or fluid leakage.
Document all the installation details, including the drilling depth, the type of casing used, the cementing process, and the test results. This documentation will be useful for future reference and for ensuring compliance with industry standards.
Troubleshooting
During the installation process, you may encounter some problems. For example, the casing may get stuck in the hole. This can be caused by a variety of factors, such as a misaligned hole, a build - up of cuttings, or a collapse of the hole wall. If the casing gets stuck, try to rotate it gently or use a jarring device to free it.
Another common problem is the presence of voids in the cement job. Voids can be caused by improper mixing of the cement slurry, insufficient pumping pressure, or a problem with the placement of the casing. If voids are detected, you may need to perform a remedial cementing job to fill them.
Conclusion
Installing a 4" casing is a complex but essential process. By following the steps outlined in this blog, you can ensure a successful installation. As a 4" casing supplier, I am committed to providing high - quality products and technical support to help you with your installation needs. If you are interested in purchasing 4" casing or have any questions about the installation process, please feel free to contact us for further discussion and procurement negotiation.
References
- API RP 65, Recommended Practice for Design and Installation of Offshore Structures - Fixed Steel Structures
- ASTM standards for casing pipes and couplings
- Drilling and Well Completion Engineering textbooks